Jun 30, 2006

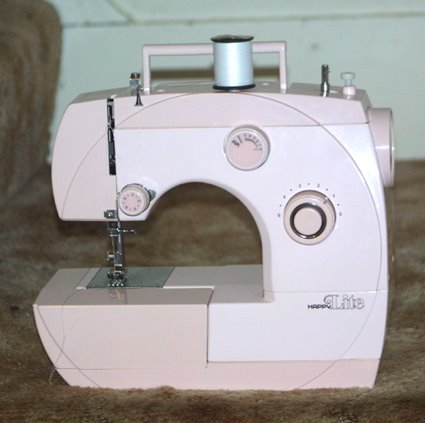
HappyLite Sewing Machine Model 1837


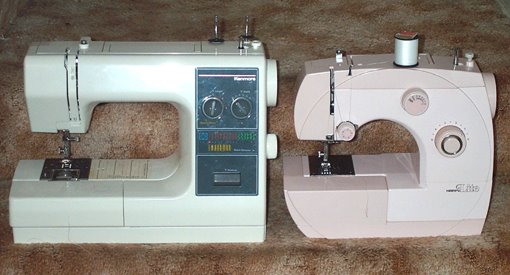
For less than $12 including shipping, I purchased this cute little machine off Ebay. I am now the proud owner of a Montgomery Ward HappyLite Sewing Machine (Model 1837). It is pale pink in color (was also available in turquoise blue), weighs about 8lbs, and has the same dimensions (13W x 10.5H x 5.5D) as the Janome 3125. The Happy Lite uses regular size bobbins, needles, and presser feet. It is designed with a free-arm sewing surface when the extension table is removed. According to the manual, it's capable of sewing delicate, light, medium, and heavy-weight fabrics. When originally shipped from the factory, the following items were included:
  • 3 machine needles
  • Bobbin
  • Felt washer to be placed under the thread spool (missing on mine)
  • Large screwdriver
  • Small screwdriver (missing)
  • Satin stitch foot (missing)
  • Dust cover, which has a little pocket for the manual
  • Manual

I have a full size Kenmore sewing machine that works wonderfully, but I wanted something small that I could use when I had small projects that needed to be done.

The HappyLite does 7 basic stitches, including straight, zig-zag, stretch, and rickrack. It also does reverse stitching. It's also capable of doing buttonholes, but I doubt if I'd use it for that.

This seems to be a well-built little sewing machine with basic capabilities. The only plastic parts are the knobs and the extension table. The only negative to this machine is that there is no task light. I plan on getting it serviced/tuned up and then using it for light sewing. It's also the perfect size to teach my younger nieces how to sew. If anyone has additional information or history on this machine, please let me know. Chances are slim, but I'd really like to find additional accessories such as:
  • straight stitch foot (#2387)
  • narrow hemming foot (#2388)
  • zipper foot (#1028)
  • satin stitch foot (#SM718)
  • automatic buttonholder (#9259)
I have contacted Montgomery Ward and was told that the current owners only own the name and they don't have any information for products that were purchased at Montgomery Ward stores.
I have learned that the machine is possibly 16 years old and may have been manufactured by Happy Industrial Corporation in Japan (The back of the machine says: Made in Taiwan) and sold by Happy America Corp., 4705 Hydraulic Rd, Rockford, IL 61109. The Happy America Corp was established in 1978 in order to sell to Montgomery Ward.

If anyone is in need of a copy of the out-of-print manuals, I have them for sale.  Leave a comment with your email address and I'll get back to you.

Jun 29, 2006

Stitching Update and a Stitching Meme


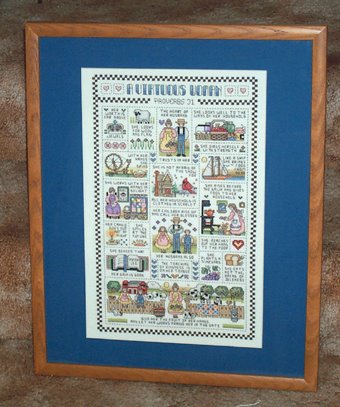
Actually this is a non-stitching update: I took a small break from stitching because I had quite a few projects that needed to get framed. As you can see from my previous entry, I framed up the Pot of Flowers – that’s what I’m calling it since I don’t really know anything about my “rescue”. I also custom framed "A Virtuous Woman" for my sister. She “rescued” this one from a consignment shop. She found it all folded up with a big stain in the lower right corner. I actually got the stain to come out! One cool thing about my sister... She recognizes how much time is put into these pieces because she sees how long projects take me to stitch up. The frame ended up being 15x19 in size. A huge monster! I think it turned out wonderful.

I still need to frame LK’s How Does Your Garden Grow. I actually stitched it back in April. Lastly, there’s an Oriental Lady that was stitched in the mid-80’s – Yet another “rescue”. It seems I still have my work cut out for me!


Just what is a Meme??

meme (mem) n. A unit of cultural information, such as a cultural practice or idea, that is transmitted verbally or by repeated action from one mind to another.

We stitchers are a culture in and of ourselves, aren’t we? Novel concept!

Now for the meme...this one has to do with floss storage:

1. How do you store your floss? – I wind my floss onto bobbins. I use like the cardboard ones even though in recent years they’re being made very flimsy, if you ask me. I know, I know: No one is asking, right?! Currently, I store them in the typical craft/floss storage containers. Is 11 floss cases too many? Don’t answer that. I have a nice fishing tackle bag that holds 8 huge containers, but I have yet to put my bobbins in it. For my "specialty" threads: The silk fibers are on bobbins in a small storage container as I don’t have many. I have a smaller tackle bag for those also. The DMC Light Effects are as I bought them and stored in a fishing tackle case. Still trying to figure out how to store them once used because they’re rather unruly!

2. Do you keep a complete set of DMC? – Ha!! Ummm… Can I plead the 5th here?? I think I may have at least 2 complete sets of DMC and then some. I have the entire set of Light Effects. Eventually, I’d like the Color Variations.

3. Do you buy new floss to "kit" up new projects or do you use out of a master set? – It’d be rather silly of me to go buy new floss to “kit up”. Wait, maybe that’s how I ended up with duplicates! Again, I plead the 5th. Usually, I will take from the master set. When working on projects, I’ll put the needed colors in one small craft container.

Jun 21, 2006

SBQ Cross Stitch Books


How many cross stitch books do you own and how often do you use them?


I suppose I have to count them? Well let's see, one entire shelf is dedicated to stitching books. Then there's one shelf dedicated to magazines and leaflets. In total, there are 41 books. Wow. Didn't know I had *that* many.

Cross Stitch A Beautiful Gift by Dorothea Hall
Cross Stitch from A to Z by Kooler Design Studio
100 Weekend Cross Stitch Gifts by Barbara Finwall
Greetings in Cross Stitch by The Vanessa-Ann Collection
555 Fabulous Cross Stitch Patterns by Donna Kooler
501 Cross Stitch Designs by Sam Hawkins
Quilt Designs in Cross Stitch by The Vanessa-Ann Collection
Hearts & Flowers Cross Stitch by Better Homes & Gardens
Alphabets & Samplers by Brenda Keyes
Decorating Your Home with Cross Stitch by Donna Kooler
A Treasury of Needlecrafts by Jean Leinhauser
Cross Stitchers Big Book of Alphabets & Borders by Better Homes & Gardens
Holidays in Cross Stitch 1987 thru 1993 by The Vanessa-Ann Collection
250 Christmas Quickies by Leisure Arts
Mary Engelbreit Cross Stitch for All Seasons
Mary Engelbreit Cross Stitch
100 Cross Stitch Christmas Ornaments
by Carol Siegel
Cross Stitch Greeting Cards
The Cross Stitch Motif Bible by Jan Eaton
Jo Verso's Complete Cross Stitch Course
John James Audubon's Birds in Cross Stitch
by Ginnie Thompson
Alma Lynne's Cross Stitch for Special Occassions
A Cross Stitcher's Oriental Odyssey
by Joan Elliott (My Favorite!)
The Pleasures of Cross Stitch by Better Homes & Gardens
The Encyclopedia of Cross Stitch Techniques by Betty Brandon
The Cross Stitcher's Bible by Jane Creenoff
Cross Stitch from a Country Garden by McCalls Needlework & Crafts
The Romance of Paula Vaughn
Sampler Stitchery
by Jill Jarnow
The Encyclopedia of Stitches by Karen Hemingway
Famous Paintings in Cross Stitch by Jan Eaton
Cross Stitch Fairies
The Cross-Stitchers Complete Companion
Gifts to Cross Stitch
by BJ McDonald
Times to Remember in Cross Stitch by Kooler Design Studio


As for how often I use them... Well, I look at them quite often. Does that count? I've made projects out of several. Wow, do I really have that many? I guess I shouldn't be surprised since I have a lot of books overall.

Anyone know how many Holidays In Cross Stitch books there are?

Revised 7/23/06: Since I originally answered this, I added a few more books to my stash collection.

An American Sampler 1989
Holidays In Cross Stitch 1995
Cross Stitch & Sampler Book

Four Seasons Cross Stitch
Expressions of Love
Classic Linens II
A Signature in Time
Country Cross Stitch
Quick & Easy Cross Stitch Gifts
An American Sampler 1990

Jun 20, 2006

Fearless Framing


Can't afford professional framing? Does framing needlework strike fear in your heart? Afraid you might mess something up and all the TLC you put into those stitches would be for naught? Don't worry (Be happy!)... It's easier than you think! I've been doing my own matting and framing for years and have never ruined a single piece. So, how do I do it?

Step One: If your project is washable, wash it. Even though it looks clean, dirt and oils from your skin and the environment most surely have attached themselves to your needlework. I use lukewarm or cool water and wet the entire stitched project. I put a tiny bit of Dawn dishwashing detergent on my hands and rub together. Then with hands on front and back of my needlework, I gently rub my hands together over the entire piece. Never, ever rub the fabric against itself or crumple it up - Unless your wish is to have a bundle of wrinkles that more than likely won't come out. If they do, it won't be easy. After the needlework is cleaned with Dawn, I rinse and rinse and rinse again to make sure the soap is gone. At this point, you can either 1) Hang the piece to dry. -or- 2) lay it face down on a white bath towel to dry. Sometimes I'll roll it up in the towel to soak up the excess water. For more info on washing, I have a blog entry called: To Bathe, or Not To Bathe.

Just an FYI... Please be aware it is not recommended to wash hand-dyed fabrics and floss. If you use hand-dyeds and HAVE to clean your project, use cold water to reduce the chance of the dyes running. There still is a chance it will, even with cold water. So, proceed with caution.

Step Two: When the fabric is slightly damp, press it with a hot (no steam) iron to remove any wrinkles and help it to dry faster.
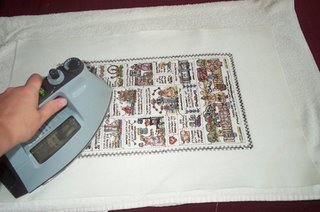


Step Three: You will need to decide what size frame you're going to use. If you really want to save money on the cost of the frame, visit your local thrift stores and consignment shops. Frames are usually very, very inexpensive there. Yard sales are also good places to pick up inexpensive frames. Don't worry if the frame doesn't have glass. I almost always have mine cut at a local glass shop and it's not expensive at all. You can have glass cut at a framing place, but you'll pay more.

Be sure to clean the inside of the frame. You don't want any dirt getting on your needlework. Just use a damp soapy cloth to wipe the dirt out. Then use a clean (non-soapy) cloth to wipe away the soap residue. Let dry. I wouldn't recommend immersing the frame in water, especially if it's a wood frame.

The fabric of your stitched piece should be 4-6" larger in width and length of the inside dimensions of the frame. If your needlework isn't large enough to fit into the chosen frame, you'll have to sew additional cotton fabric along the edges of your needlework.
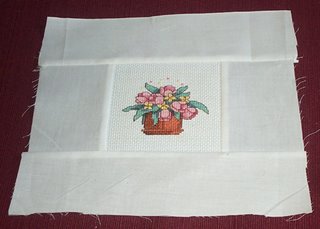
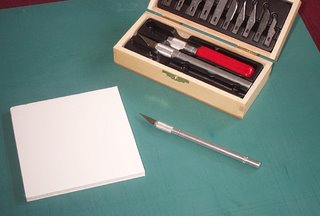
Step Four: Cut your foam core board 1/8" smaller than the inside dimensions of your frame. Foam core comes in sheets 20x30" in size and is 1/4" thick. It can be found at JoAnn Fabrics, Michaels, and Hobby Lobby. When cutting foam core, use a sharp craft knife. Cut slowly and carefully using several passes. Don't try to cut through the entire thing at once, or you'll end up with a jagged edge. Trust me, I know from experience! Do it slow and easy, and you'll be fine.
Step Five: Find the center of your foam core by drawing a light pencil line from corner to corner forming an "X". Then find the center of your stitched piece by folding it into quarters. Place a pin in the center of your stitched piece and then put the point of the pin at the center of the foam core. Press into place. Using T-pins, anchor the stitched project along the edges of the foam core.


You can also use binder clips to hold the fabric in place -- it's easier and faster. Once you have the stitched project secured to the foam core, you can remove the pin in the center.


Step Six: Time to lace up! You will need cotton thread to lace your project onto the foam core. There are several alternatives you can use: crochet cotton, 6 strands of white embroidery floss, kite string, and dental floss. I have used crochet cotton and embroidery floss. You'll need a nice long piece - at least 2-3 feet in length. Anything long than that and you'll probably end up getting it tangled and knotted... which will end in frustration! Starting at one edge, secure (it's OK to knot it) the end of your thread to the fabric on the backside of the foam core using a sharp needle. Insert the needle in one size then the other creating a zig-zag with the thread. Once you've done the entire length, secure the thread and cut it close to the fabric. If you find that you don't have enough string to lace the entire piece, it's OK to knot it to another 2-3 ft. piece. Just make sure the knot is secure and it's toward the center of the zigzag.


Tucking the corners in neatly, start the entire process again on the opposite sides. After I get done lacing, I'll usually use a slip stitch and stitch up the corners to make it look neater. You can then remove the T-pins.


Step Seven: If you had to sew on additional fabric, you'll need a mat to cover it up. You may want one anyway for asthetic purposes. If you aren't using a mat board, you'll have to get some spacers to keep your project from touching the glass. You can purchase ready cut mat boards at almost any place that sells frames. If your project is an odd size or you wish to have an unusual opening, you'll have to have it custom cut at a store that does framing (Ben Franklin Crafts, Michaels, Hobby Lobby). I have all the tools so I usually cut my own.


Assemble the framing materials -- frame, glass, mat board, laced project. Be sure to thoroughly clean the glass before adding the matboard and project. Be aware that some frames are not deep enough to accomodate the thickeness of the glass, mat board, and foam core. It's still OK to use these frames, you'll just have to use acid-free mounting tape to hold the project securely in the frame. I use it anyway even if the frame is thick enough.


Step Eight: Cut a piece of brown crafters paper (You can get a big roll of this at home improvement stores for around $6 and it lasts forever.) slightly smaller than the back of the frame. The easiest way to do this is trace the perimeter of the frame. Then cut it slightly smaller. Place double-sided archival tape along each of the four sides on the back of the frame. Gently press the brown paper to the back of the frame. Add a hanger to the back of the frame.


The smaller hangers will work for smaller sized projects. The above frame is 5x5" in size. Anything larger than 11x14, I recommend using the wire hangers. You don't want your projects falling off the wall, like one of mine did once and go bouncing down the stairs! Luckily it wasn't damaged, but I did put a wire hanger on the back afterwards!


Viola! You've just framed your first piece. It wasn't so bad, was it?
P.S. If anyone has info on the above piece (the flowers), please let me know. It was another "rescue".

Jun 18, 2006

Happy Father's Day


Here's a card I stitched up for my Dad in honor of Father's Day. It's entitled "New Car" but it looks like a classic model to me. My Dad likes old cars so I thought this card was fitting.


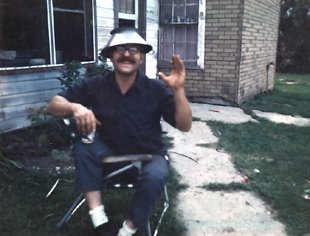
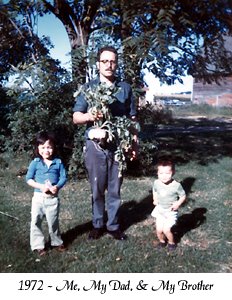
What can I say about my Dad? My earliest memory is my Dad on a riding lawn mower and pulling a little wagon behind with my brother and I. We were mostly likely thinking it was the greatest thing in the world. We couldn’t have been more than 2 or 3 years old. You can tell when my Dad is in an especially good mood... he has a silly, quirky sense of humor that comes out.

My Dad is a blue collar guy. He was and still is very handy. For many, many years he had a second job repairing small engines – mostly lawnmowers. He once took a metal tricycle, cut it up and turned it into a Big Wheel for my brothers. (Anyone remember what a Big Wheel was?) He also refinished furniture and made things out of wood. A beautiful cedar-lined chest he made… from a photograph I found in a catalog… sits prominently in my living room. Another nice piece – a small shelving unit – hangs on my bedroom wall. He made it when I was in my early teens. I have moved it from place to place with me for over 25 years. It matches my current bedroom set perfectly.

My Dad taught us how to learn to do things for ourselves. Do you know how many times I asked him how to spell this word, or that word? The response I got every single time was: “Go look it up in the dictionary.” Guess what? I am a very good speller and to this day, I *still* look up words in the dictionary. I have a dictionary at work and several at home. He also taught me things about cars… like how to change a tire. I thank my Dad for making me learn how, while he “supervised”. I can’t tell you how many times I’ve had to change a tire! He also taught me how to change the oil in a car. That skill came in handy last weekend! Thanks to my Dad, I’ve done other basic repairs such as hose and thermostat replacements.
Weekend camping trips – “real camping” in the woods, not a campground – with my Dad (and Mom, too) gave us a love of nature. There was no Playstation, TV, or portable DVD players in the woods! Actually, we didn’t even have Atari back then. We learned to fish and explore the area. We learned to observe and appreciate the things in nature. We learned to create our own fun. Of course, he didn’t like it too much when he was fishing and we made a lot of noise. LOL – Where’s the fish for supper, Dad?

Thanks Dad, for all you’ve done. Happy Fathers Day!