Jan 10, 2018

Dimensional Flat Ornament and Cording Tutorials

Look what I found!  While searching through my blog posts, I found this post I created in December 2012 which I never published.  How did that happen?

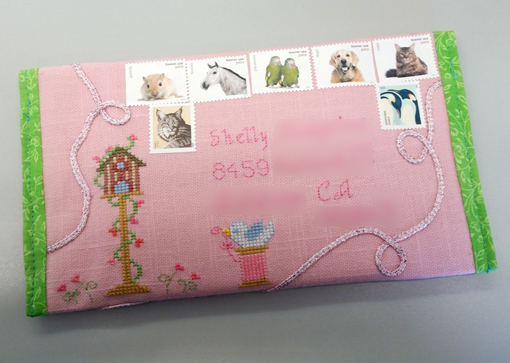
Dimensional Flat Ornament Tutorial


MATERIALS
•  Stitched piece
•  Coordinating fabric
•  Thin, sturdy cardboard
•  Flat batting
•  Tacky glue
•  Ruler
•  Scissors
•  Pencil
• Binder clips, or something similar.


STEP ONE:
Decide what size you would like your stitched piece to be and cut one piece of cardboard to that size.  For ornaments, I like to have about 1/4" border around the edge of the stitching.  So, if my stitched piece is 2 x 3 inches, I will cut the cardboard to 2½ x 3½".


Determine what size you'd like your back piece to be and cut two from the cardboard.  Your stitched piece will be mounted onto the backing piece.  For ornaments, I like to have a perimenter of ¼ to ½" around the stitched piece.  For the 2 x 3" ornament, the two backing pieces would be 3 x 4".  You may want to label the pieces.

STEP TWO:
Glue a piece of batting to the cardboard you'll be using for your stitched piece. 


After the glue is dried, trim off the excess batting.

STEP THREE:
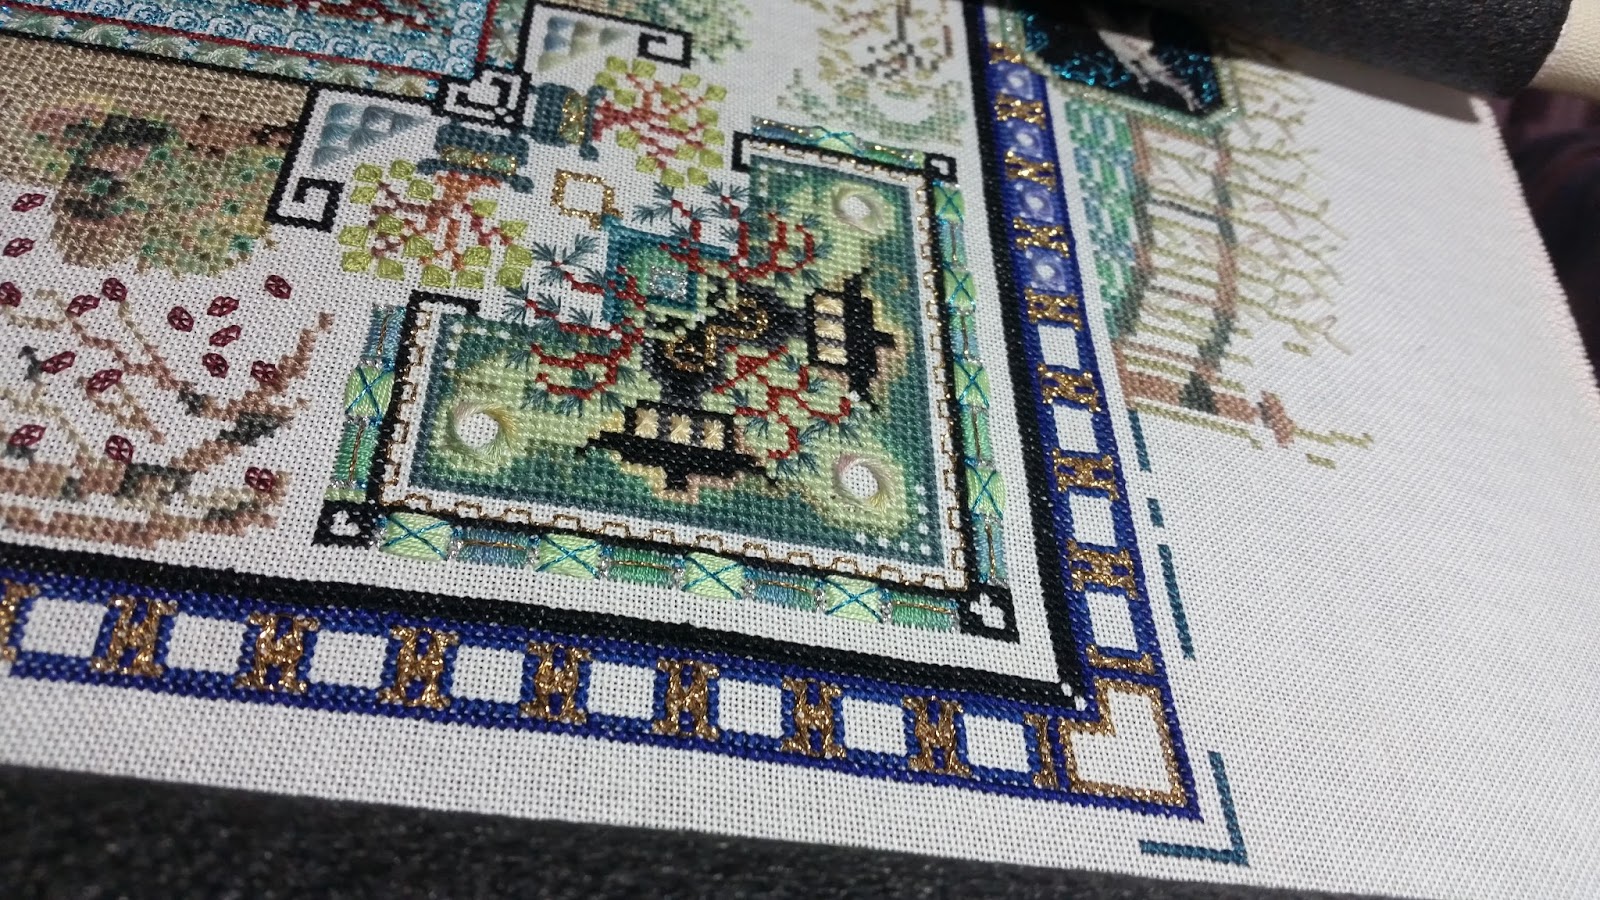
This step involves attaching the stitching to the batting-covered cardboard.  Wash and iron your stitched piece if you wish to do so.  I like to lace my stitched piece onto the cardboard because it's easier and more forgiving to adjust placement on the cardboard if it's not placed correctly.   You can glue it on if you wish (See Step Five for the How-To).  If you glue the stitching on crooked, it's not as easy to adjust without taking it apart.


Look!  I stitched this in 2008.

STEP FOUR:
Cut two pieces of your coordinating fabric about ¼" larger than your two remaining  cardboard pieces.  No need to be exact on measurements.


If your fabric has wrinkles, you may want to iron them out!


STEP FIVE:
Grab your craft glue and a wet (not soaking) rag. I always store my glue upside down in a jar and put the wet cloth on a plastic lid or a plate.


Now comes the "fun" part!

Keeping the fabric and cardboard on a flat surface, place a small dab of glue in the corners. Using your finger, spread the glue into a thin layer.  Wipe your finger on the wet rag. Fold the corner of the fabric over the corner of the cardboard.


Place a bead of glue along one side. Using your finger, spread the glue. Wipe your fingers. Starting at one corner, fold the fabric over the edge tightly -- this is important in order to get tight pointed corners. Do the same with the opposite corner. Remember to wipe your fingers after EACH time you touch the glue, otherwise you'll end up with glue on the fabric! Flatten the fabric in between by pushing down and toward the center of the cardboard in a sweeping motion. Repeat for remaining edges.

Repeat entire process for second backing piece.

STEP SIX:
On the back of the stitched piece, place a small line of glue along the perimeter... approximately 3/8" from the edge. Squiggle some glue around in the center. Place in the center on the right side of one of the fabric-covered backing pieces.


Use binder clips to hold the pieces together tightly while the glue is drying.  Take the clips off after about 30 minutes.  You may have some indentations, but they're easily removed with a steam iron.  I use binder clips a lot and have never had permanent indentations.  Now, you if leave them on for days I can't guarantee you won't!

While the glue is drying, create your cording.

STEP SEVEN:
Put a small amount of glue on a scrap piece of cardboard.  Using a toothpick as a "glue brush", dab glue into the crack between the stitched piece and the fabric-covered piece.  Gently press the cording into place.  I always start the cording at the bottom so that it's not as noticeable.


Note: Dabbing a bit of glue on the ends of the cording will keep it from unraveling.

STEP EIGHT:
Cut a piece of cording for the hanger. Place it on the back.  Place a line of glue around the perimeter and squiggle some in the center.


Press on the other fabric-covered piece of cardboard, wrong sides together.  Place binder clips around the edges until the glue dries.


STEP NINE:
Repeate Step Seven to put cording around the outside edge.  Let dry and you have a finished ornament!


Sing Noel
Stitched: 12/14/08 Time: 3Hrs
Designer: Primrose Needleworks
Fabric: 18ct Seafoam Green Aida
Fibers: GAST, DMC Color Variations, The Dye Shop
Embellishments: Handmade cording w/DMC 321 & 815


CORDING TUTORIAL

Ever go to shopping for cording and not been able to find that "perfect" color?  Make your own!  It's not difficult at all.

Here's what you'll need:


•  Cording Drill or a Pencil
•  D-clip (for weight)
•  Suction Cup Hook
•  DMC 6-strand Floss or Pearle Thread

STEP ONE:
Determine how much cording you'll need.  Measure the perimeter of the ornament you'll be adding the cording to.  Multiply the measurement by 4 and cut two pieces of floss.  If you want to make two-colored cording, cut one piece of each length.  This is should give you plenty of cording.

STEP TWO:
For single-colored cording, tie both pieces together by putting a knot at each end.  For double-colored cording, fold each color floss in half and loop them together in the center. The knot each end.


STEP THREE:
Take the suction cup hook and attach it to a smooth vertical surface... wall, window, refrigerator, mirror, etc.  Make sure it's at least 4 feet (or higher) off the floor.  Place one knotted end of the cording over the hook.  Place the D-clip onto the floss and back away from the hook so that the floss is loosely stretched out.


Place the other end onto the hook of the cording drill, or onto a pencil.  Turn the crank of the cording drill, or twist the pencil.  Keep going.  Keep going.  Keep going... and going, and going, and going.  Keep twisting until the floss is wound tightly.  You'll be done when you step forward and the floss twists into cording.  The D-clip will put a little weight so that it winds quickly.


If you're really brave, you could go the "More Power!" approach and use this:

Variable speed cordless drill and cup hook!

Use low speed and wind away.  Works much better and faster than a pencil, that's for sure!

Until next time...

Jan 5, 2018

2017 Recap - Stitchy Finishes

Sometimes I surprise myself.  With as busy as I was in 2017, I still managed to create ELEVEN finishes.  I know, I know... it's not many, but pretty good considering I don't have a lot of time to stitch.  The job... need I say more?!

Revised:  I realized I'd forgotten one finish. So, I actually had 12 finishes!

Without further adieu, my 11 12 finishes:

FINISH #1:
At the beginning of the year, I participated in the Stitchers Day Exchange with Yahoo group Friendly Stitchers.  I really enjoy this exchange since the theme celebrates STITCHERS!

Fabric: 28ct linen
Fibers: GAST Burlap Nap Sack
Embellishments: Lace weaved with DMC

There was some controversy surrounding the design and designer when I posted my finish on Facebook.  If you're interested in reading more about it, go HERE.

FINISH #2:
In a mailart group (both on Yahoo and Facebook), I coordinated a Spring themed mail art exchange.  This is another exchange I enjoy doing.  I try to do at least one if not more stitched mailart exchanges each year.

Front Designs:

Back Designs:  Spring by Lizzie Kate

More details on this particular exchange can be seen HERE.  If you're interested in how to make a mailart envelope, just look on the left side bar under tutorials.

FINISH #3:
In 2016, I participated in the 12 Days of Christmas exchange coordinated in the Stitchers Circle Yahoo group.  I was ecstatic when I received not one, but two kits in the Victorian Pansies series (I stitched the needlebook and scissor keep in 2007 and 2008).

Victorian Pansies Bookmark by Textile Heritage

FINISH #4:
Even though I don't have many, I do love stitching Patriotic pieces.  I've had this design (now OOP) and the frame for quite a few years.  I finally told myself to "stitch it!"

Design:  Flag 1998
Designer: Bent Creek
Fabric:  28ct Blue Gray Linen
Fibers:  DMC, WDW, GAST
The frame is what was called for in the leaflet.

FINISH #5:
As I mentioned in Finish #3, I received two kits.  This one finishes up the series of four kits in the Victorian Pansies series.  All of them turned out so pretty!

Victorian Pansies Sachet by Textile Heritage

Here they are... all four together:

Aren't they gorgeous?!!

FINISH #6:
No matter how tough, frenzied, or stressful life gets, I always think about how it could be worse.  So, this is a very apt design.  While visiting my "other mom", she was stitching this design.  She gave it to me to stitch.  I switched up the colors.

Design: Abundantly Blessed
Designer: The Trilogy
Fabric: 14ct Brown Aida
Fibers:  DMC and Carries Creations

Remember, whether you think so or not... You really are Abundantly Blessed!

FINISH #7:
Toward the end of the year brings Christmas ornament exchanges.  This one was sent off to a fellow stitcher, Marina who lives in Canada.

Design: Let It Snow
Designer: Casey Buonaugurio
Fabric: 28ct White Cashel Linen
Fibers: DMC

I had envisioned a snowflake finish, so I went in search of something I could use to finish this adorable snowman.  I found a bunch of wood snowflake ornaments at Michaels, and had the mitten button in my stash.  I don't know if anyone else has this problem, but each time I make an ornament for an exchange, I want to keep it for myself!  Marina sent me the sweetest email after receiving it. It warms my heart that she liked it so much.

FINISH #8:
This was supposed to be an ornament (for an exchange) also, but after stitching it, I realized it was too big for an ornament.  What's a girl to do?  I decided to make it into a pillow!

Design: Love and Dreams
Designer: Jan Fate of Angel Stitchin
Fabric: 28ct Linen
Fibers: Carries Creations, GAST

I changed up the colors on this design to suit the tastes of the recipient.  When I saw the fabric, I knew it was perfect for this design.

FINISH #9:
I'm not really one for Halloween designs, but once in a while one will catch my eye.  I finished stitching this one at the Hoosier Retreat which is held in Indiana each year.

Design: Full Moon
Designer: The Drawn Thread
Fabric: 32ct Linen
Fibers: DMC, GAST, WDW
The box is from Cottage Garden.

The tricky part about finishing this piece to fit it in the treasure box was learning the nun stitch and doing it in a circle shape.  It's not exactly perfect, but no one can tell once it's in the box.  The box is well made and I really liked how the entire project turned out.

If you're looking to use a treasure box like this, I recommend shopping around.  I wrote about my experience HERE.

FINISH #10:
As a Christmas gift, I stitched another "ornament" that turned out to be too large.  Again, I made a pillow.  One thing I've learned is that aida works great (compared to linen--I may need heavier interfacing) for this type of finish.

Design: Outside My Window
Designer: Diane Graebner of Lynn's Prints
Fabric: 14ct Baby Blue Aida
Fibers: DMC
Embellishments: Rice Beads and Handmade Cording

This design is from 2005 JCS Christmas Ornament Issue.  One thing to note is that some of the called for embellishments/beads may be difficult to find many, many years later.  I substituted the rice beads because I couldn't find the ones called for by the designer.  The smallest package of rice beads I could find was 4,000.  As you can see, I only needed 8!  Anyone need rice beads?

FINISH #11:
When I saw this design, I thought it would make a wonderful Christmas gift.


However, I didn't care for the color choices of the designer and wanted to make them more to the recipient's liking.  I changed the colors and simplified design to this:

Design: Family Matters
Designer: Hinzeit
Fabric: 28ct Silkweaver Solo Jobelan
Fibers: DMC, WDW, GAST

I started and finished stitching this at the Hoosier Retreat I mentioned earlier.  It was a fun stitch.  I found the frame at a thrift store.  Originally, it was gold and I painted it a gloss white then cut a blue mat to coordinate.  The recipient really liked it.

FINISH #12:
While spending Christmas in Virginia, I started and finished this adorable snowglobe.  It's from the 2017 Just Cross Stitch Ornament issue.

Design: Snow Much Fun at the Northpole
Designer: Frosted Pumpkin Sttichery
Fabric: 28ct Sky Blue Linen
Fibers: DMC

The fabric looks gray in the photo, but really it's a light blue. That little penguin is so adorable!!

WIP's:
I'm seeing light at the end of the tunnel for Japanese Garden!  I went to a stitching get-together in September where I put in a few more stitches.  Yes, it's really true... I have proof...


Not only that, I've stitched on it a bit after that day.  Here's what JG looked like at the beginning of 2017:


By the end of 2017, I had to move JG up on the scroll rods.  Here's what it looks like now:


Who knows... Maybe by the end of 2018, I'll be ready to start putting beads on it!

The other project I've been working on is called Swallows by Maia.  Another stitcher asked me to finish it for her.  When I received it in July, it looked like this:


I didn't work on it as much as I'd liked to (Sorry, Debby!), but did make some progress.  Here's what it looked like at the end of 2017:


The backstitching makes such a difference!  I think the flowers are so pretty with the vines.

Hopefully, 2018 will allow me to have more stitchy sessions.

Until next time...